Introduction
MLflow is an open-source platform designed to streamline and manage the machine learning lifecycle, from experimentation to deployment. Lambda offers high-performance GPU instances that are perfect for training and deploying machine learning models.
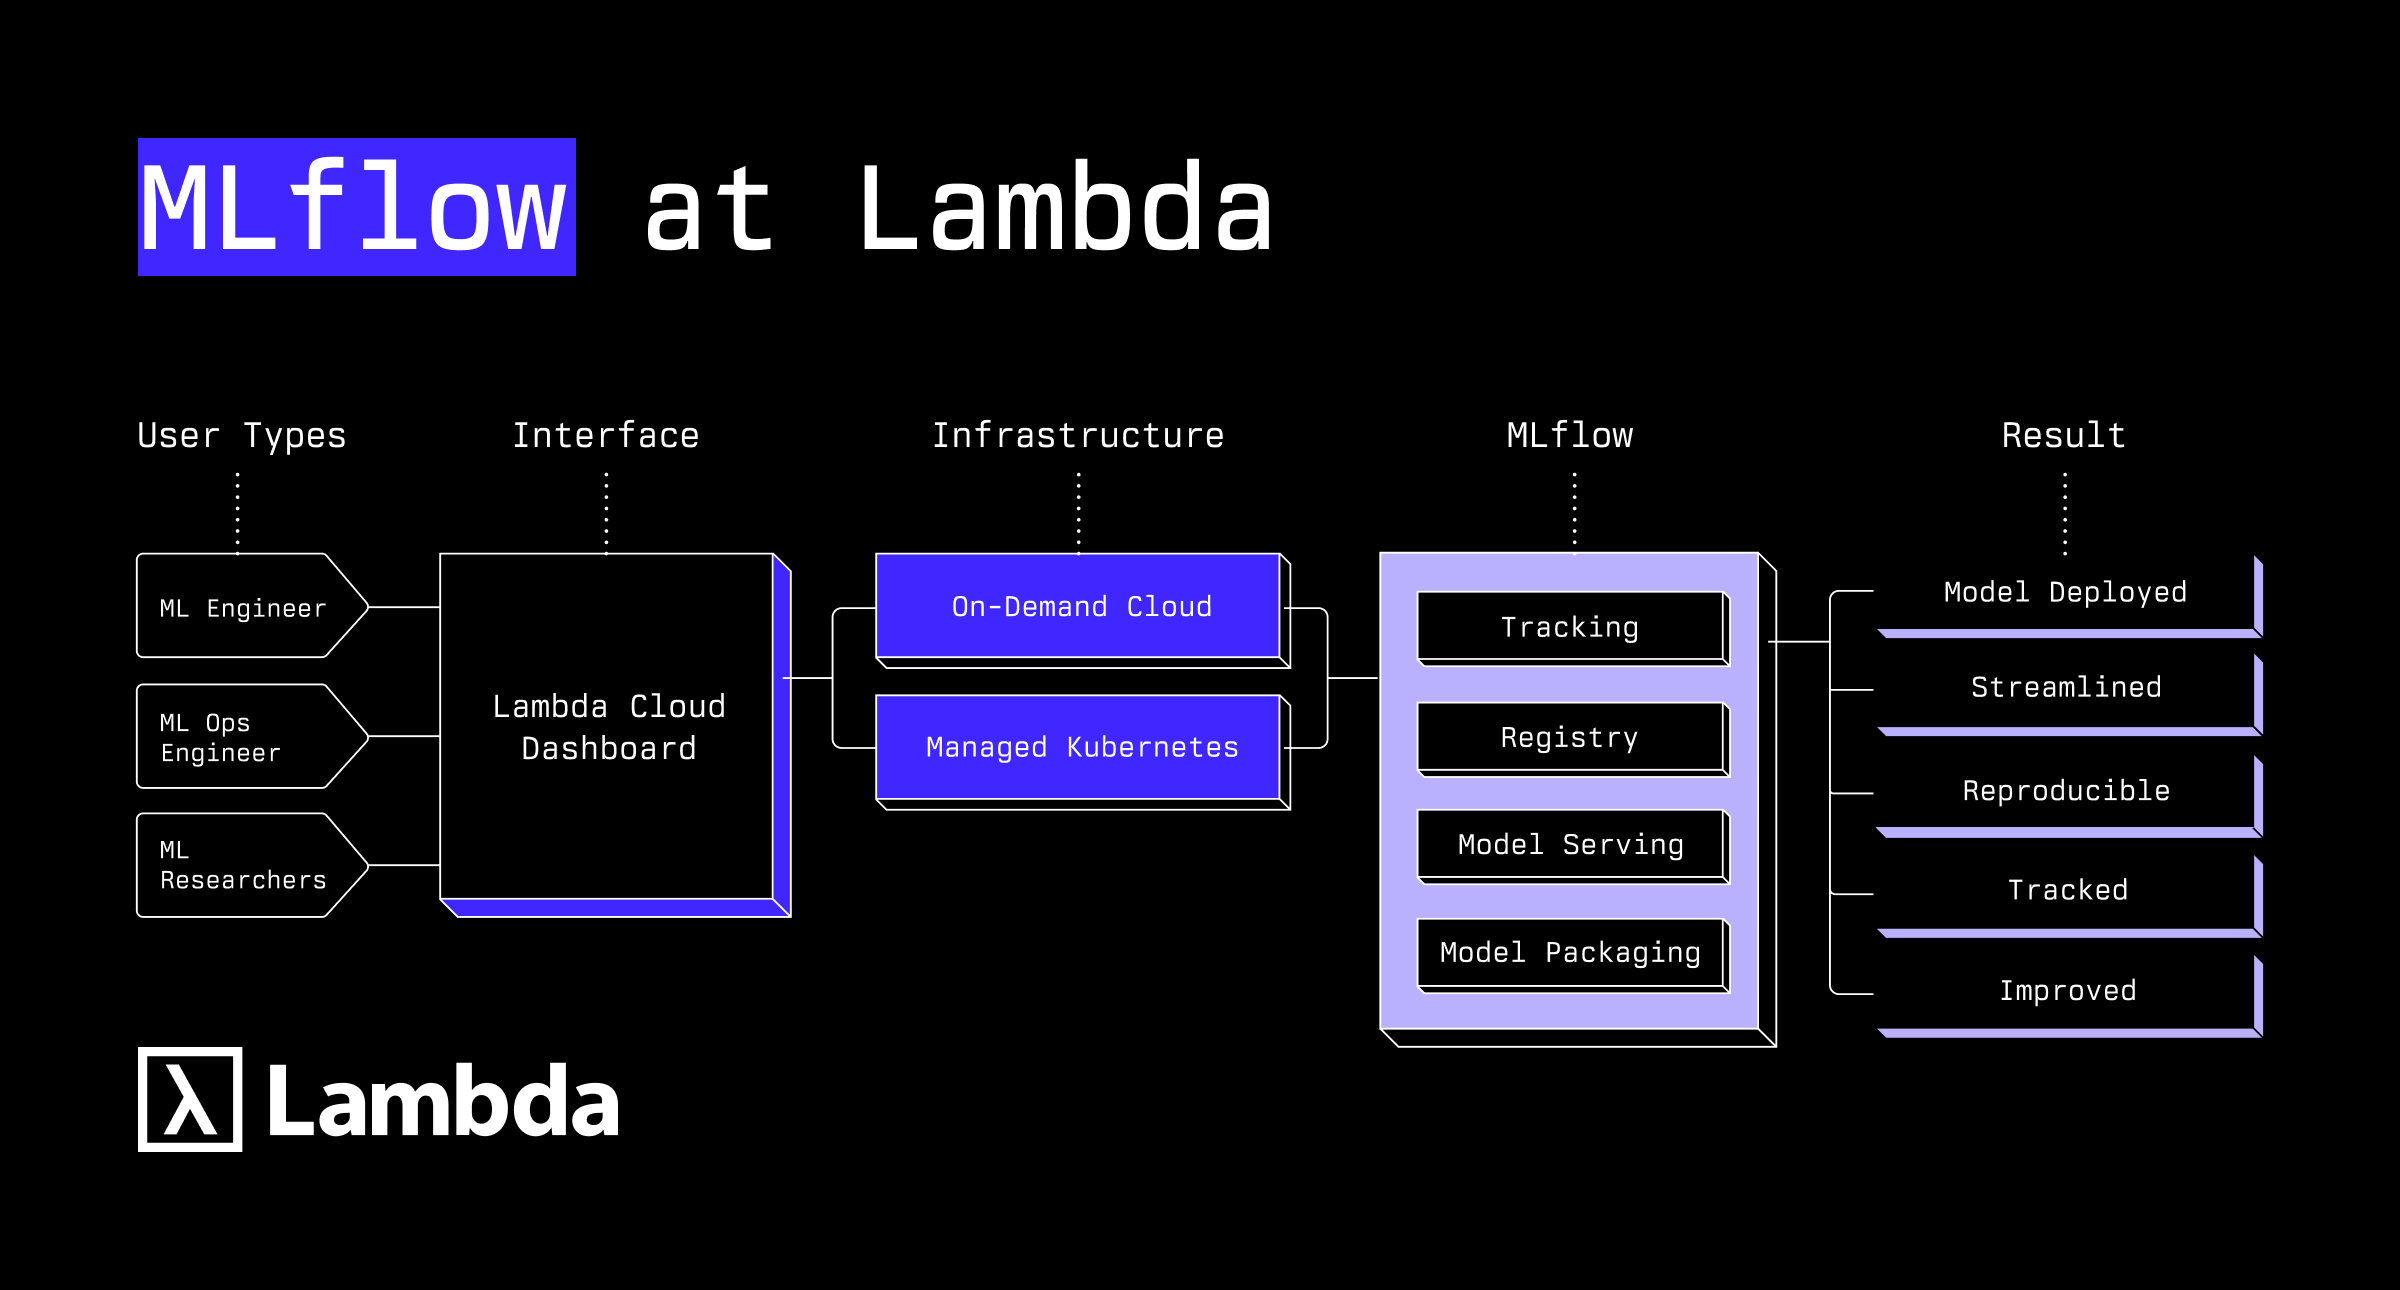
Just like Lambda’s optimized infrastructure has simplified efforts for machine learning engineers, MLflow has further simplified the model lifecycle deployment process. By combining Lambda Cloud’s on-demand instances, GPU leases, and reserve cloud options with MLflow's experiment tracking capabilities, you'll have a robust platform to host, track, optimize, store, and deploy your ML projects.
This guide will show you how to implement MLflow on Lambda Cloud's on-demand and reserve cloud instances, providing a powerful and cost-effective environment for your ML workflows.
Prerequisites
Before we begin, make sure you have the following:
- A Lambda Cloud account
- SSH key set up for accessing remote instances
- Some familiarity with MLflow’s features and functions at a high-level
Implementation of MLflow with Lambda
Part 1: Understanding MLFlow Capabilities
MLflow is an open-source platform that helps manage the complete machine learning lifecycle, including experimentation, reproducibility, and deployment. MLflow is an integral tool for machine learning engineers, taking the complexity out of model deployment.
MLflow currently offers of four main features for model management:
- Tracking (logs parameters and results)
- Projects (packages code)
- Models (manages and deploys models)
- Registry (centrally stores models).
Part 2: Setting Up Your Lambda Cloud Environment
Launching an On-Demand Instance
1. Log in to your Lambda Cloud account
2. Navigate to the "Instances" tab

a. Choose an instance type with appropriate GPU resources for your workload
b. Select your preferred region
c. Choose a Linux distribution (Ubuntu 20.04 LTS is recommended for compatibility)
d. Set the storage size based on your needs (at least 100GB is recommended for ML workloads)
4. Click "Launch" to create your instance

You have successfully launched your Lambda cloud instance and can now host your machine learning models.
Part 3: Configure Network and Firewall Settings
Lambda Cloud instances require proper network configuration to allow MLflow server access. Next we will configure the network and firewall settings to ensure proper protocols are in place.
1. Once your instance is launched, navigate to the “Firewall” tab
2. Configure the following firewall rules:
a. Allow inbound traffic on port 22 for SSH (should be enabled by default)
b. Add a new rule to allow inbound traffic on port 5000 (the default MLflow UI port)
c. If you plan to use a custom port for MLflow, add that port instead or in addition

Verify Connection to Your Instance
1. From the Lambda Cloud dashboard, find your instance's IP address
2. Open a terminal on your local machine and connect via SSH:
ssh ubuntu@YOUR_INSTANCE_IP
3. Once connected, update the system packages:
sudo apt update && sudo apt upgrade -y
Part 4: Installing and Configuring MLflow
Installing Python and Dependencies
1. Install Python and related tools:
sudo apt install -y python3-pip python3-dev build-essential libssl-dev libffi-dev python3-venv
2. Create a virtual environment for MLflow:
python3 -m venv mlflow-env
source mlflow-env/bin/activate
3. Install MLflow and necessary packages:
pip install mlflow scikit-learn pandas matplotlib boto3
Include any other necessary packages that are specific to your model and use case.
Setting Up Storage for Artifacts
MLflow needs a location to store artifacts. You can use local storage or cloud storage:
1. Create a directory for MLflow artifacts:
mkdir -p ~/mlflow/artifacts2. Setup Cloud Storage (optional)
Starting the MLflow Tracking Server
1. Launch the MLflow tracking server:
mlflow server \
  --backend-store-uri sqlite:///~/mlflow/mlflow.db \
  --default-artifact-root file:///home/ubuntu/mlflow/artifacts \
  --host 0.0.0.0 \
  --port 5000
2. For a persistent setup, you might want to run MLflow as a service. Create a systemd service file. Adjust content to your paths and specifications as needed.
sudo nano /etc/systemd/system/mlflow.service
3. Enable and start the service:
sudo systemctl daemon-reload
sudo systemctl enable mlflow
sudo systemctl start mlflow
4. Check the status:
sudo systemctl status mlflow
You have now successfully implemented MLflow using Lambda’s hosted cloud infrastructure.
Summary
Today we utilized the Lambda Cloud infrastructure to walk-through the process of how a machine learning engineer may implement MLflow to further support the hosting and deployment of your models. Now with MLflow, your models can be traceable, reproducible, optimized, and easily managed without complicated operational overhead.
Ready to dive in? Get started to see how we can supercharge your model deployment.